GitHub
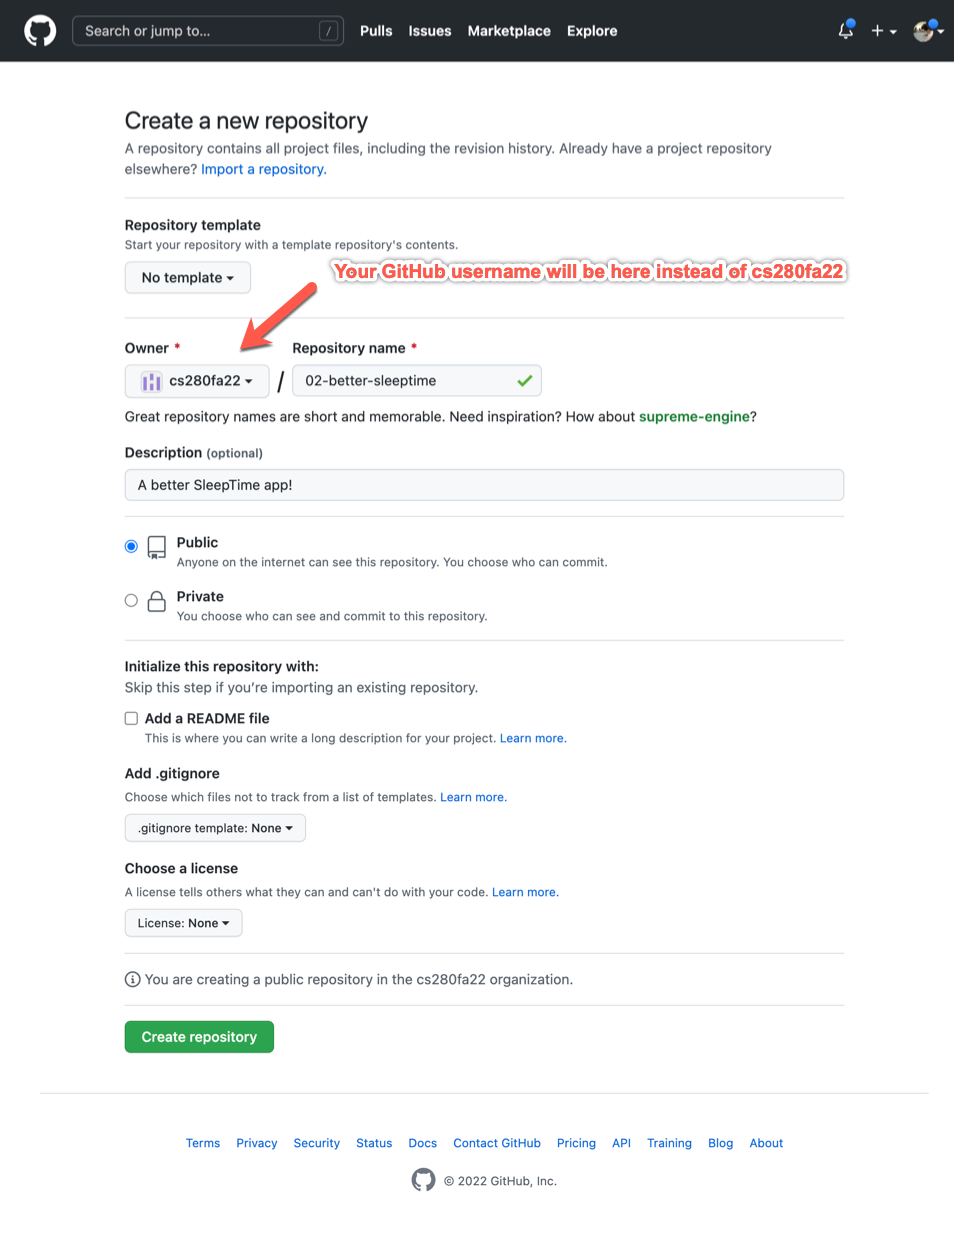
Let's put our SleepTime App on GitHub for the world to see! Go to GitHub, login, and then create a new repository:

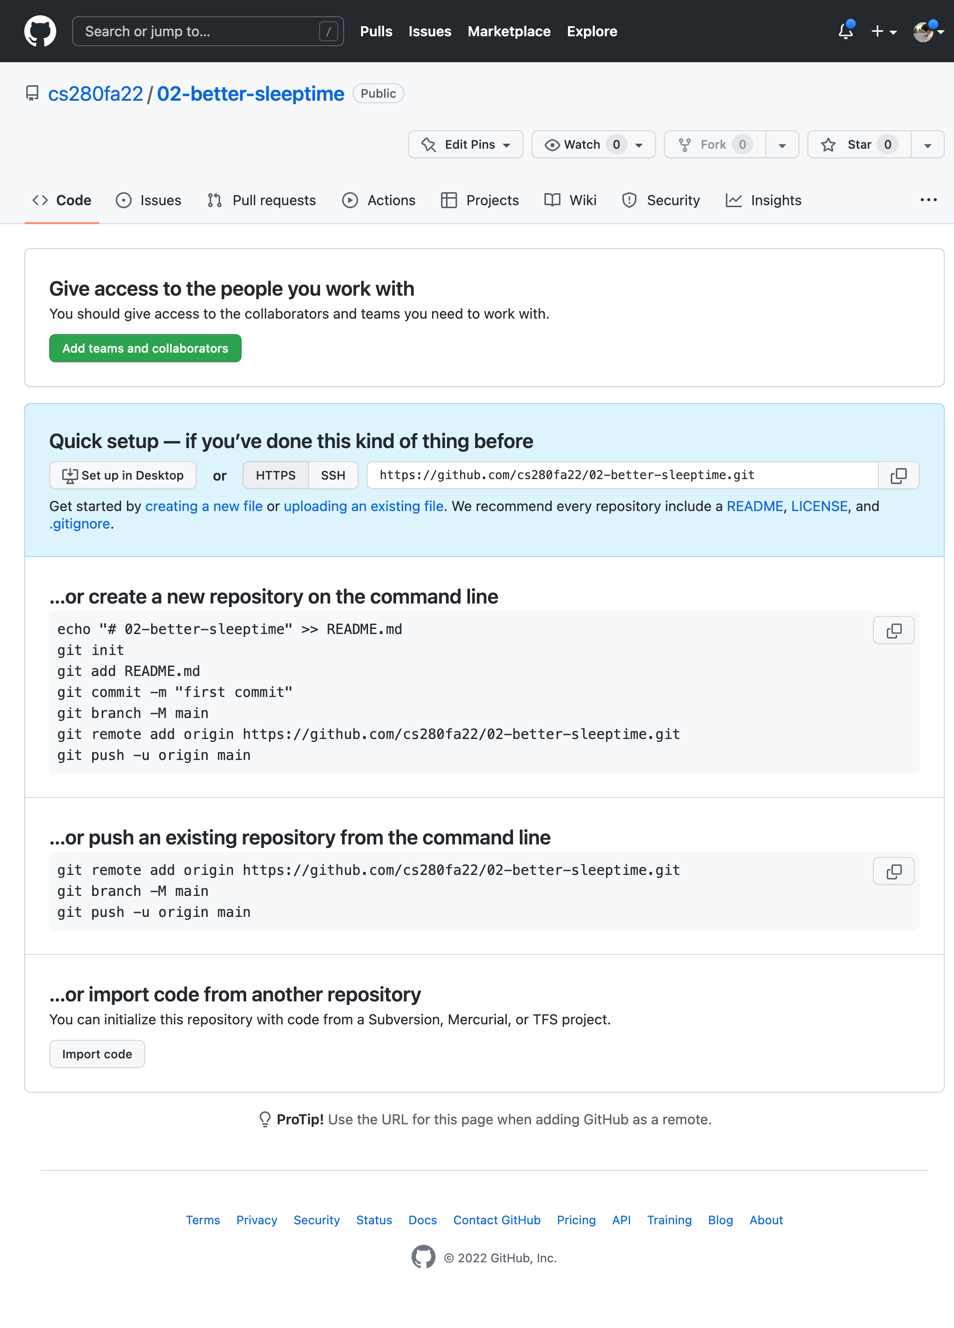
Once the repository is created, GitHub provides a few helpful suggestions to start working with it.

Since we already have a local repository, we follow the instructions for "...or push an existing repository from the command line." For the repository I've created, this is the command I must use (the GitHub repo URL will be different for you):
git remote add origin https://github.com/cs280fa22/02-better-sleeptime.git
git branch -M main
git push -u origin main
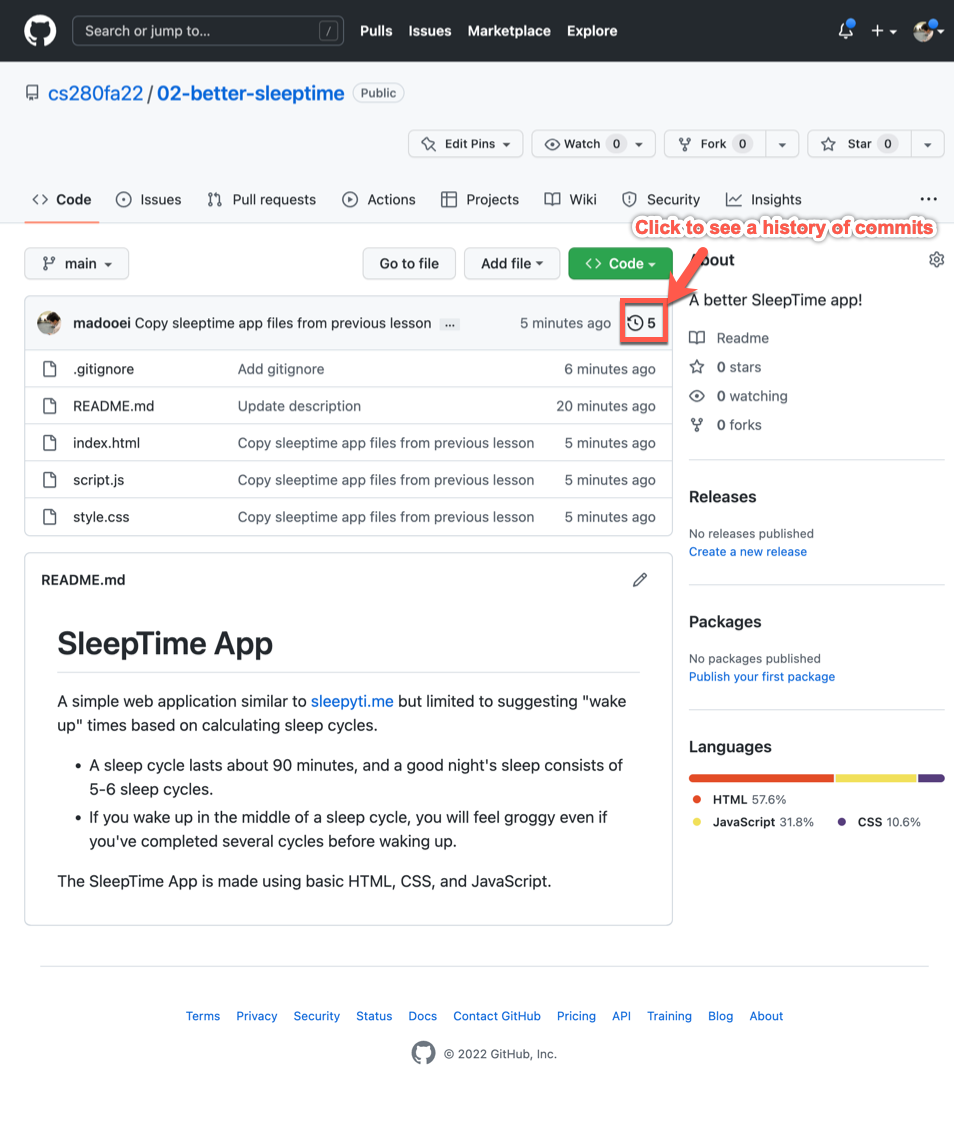
Run the above commands (but use the ones generated for your repository) in the terminal. Next, refresh the page on GitHub; you must see the content of sleeptime-git folder uploaded to your GitHub repository.

Notice how GitHub automatically loads the content of README.md as the description of your repository.
In your GitHub repository, you can click on any of the files to open it. There is even a built-in editor.
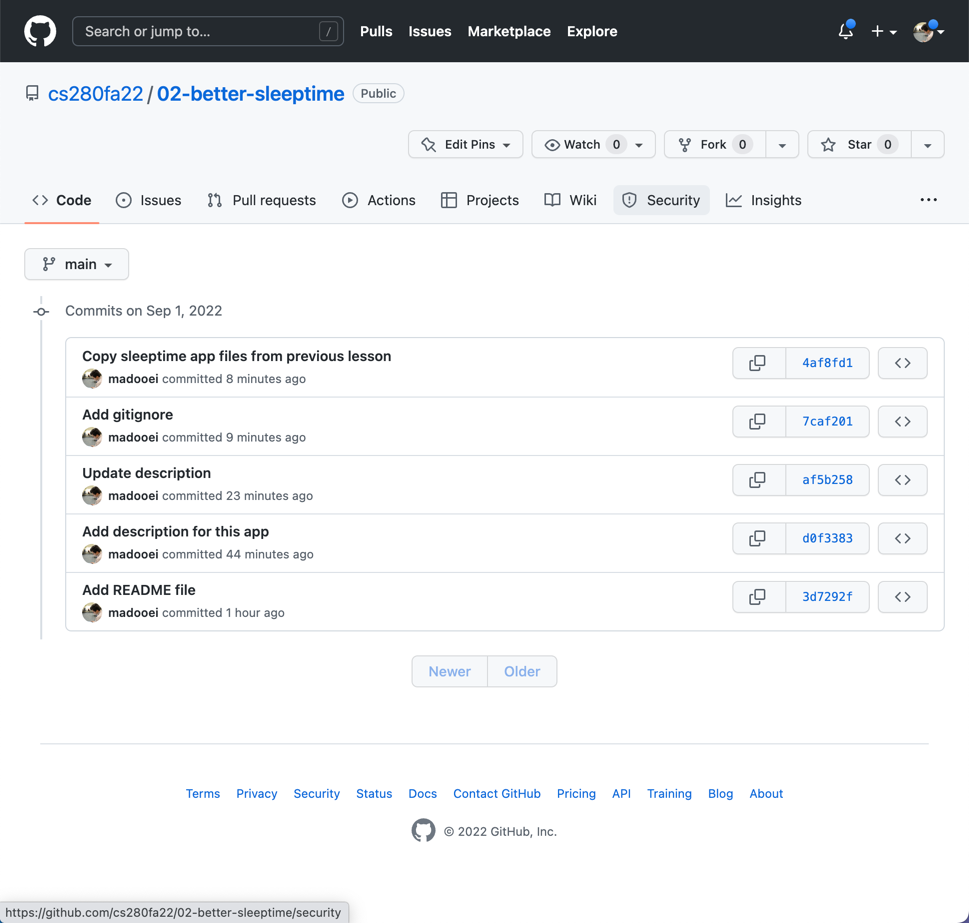
Moreover, there is a list of all commits (similar to git log but fancier!).

You can click on any commit to see a list of diffs associated with it.
Git vs. GitHub
Let me emphasize Git and GitHub are not the same! Git is a version control system, whereas GitHub is a repository hosting service and a collaboration platform. Moreover, GitHub provides a lot of valuable services for hosting software projects. We will explore some of these features in this course.